
Your store charges with three payment methods: Mercado Pago, bank transfer and pay at pickup. You can turn on any of them at once, and the customer picks one at checkout. This guide covers how to turn each one on and what happens to the order afterwards.
All three live in Settings → Payment Credentials. A method shows there only when your plan includes it: Mercado Pago and bank transfer are add-ons, and pay at pickup appears once pickup in store is turned on. Each method has its own Save button.
A customer can only finish a purchase when at least one method is turned on and complete.
Mercado Pago
Needs the Mercado Pago add-on.
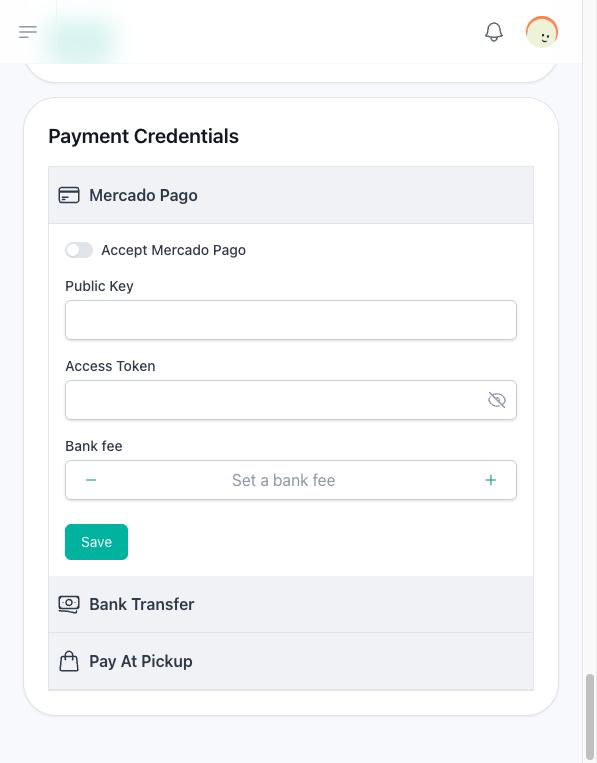
| Field | What to write |
|---|---|
| Accept Mercado Pago | Turn it on to offer the method. |
| Public Key | The public key of your Mercado Pago account. |
| Access Token | The access token of your Mercado Pago account. |
| Bank fee | A percentage between 0 and 50 that the customer pays on top of the products. |
With the switch on, the three fields are required. The Bank fee is added to the order as Payment Method (3%) — with your percentage — and charged on the price of the products, not on shipping.
What your customer sees: after the order summary, they are taken to Mercado Pago to pay. When Mercado Pago sends them back to your store with the payment approved, the order is marked Paid and Active, the payment is recorded under Sells → Payments, and the emails of a new order go out.
Bank transfer
Needs the Bank transfer add-on.
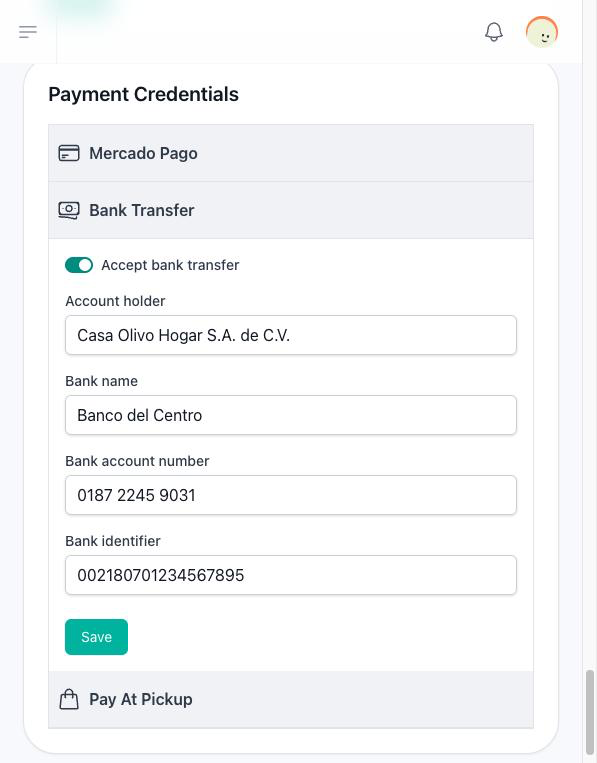
| Field | What to write |
|---|---|
| Accept bank transfer | Turn it on to offer the method. |
| Account holder | The name on the account. |
| Bank name | The bank. |
| Bank account number | The account number. |
| Bank identifier | The interbank key the customer transfers to. |
With the switch on, all four are required.
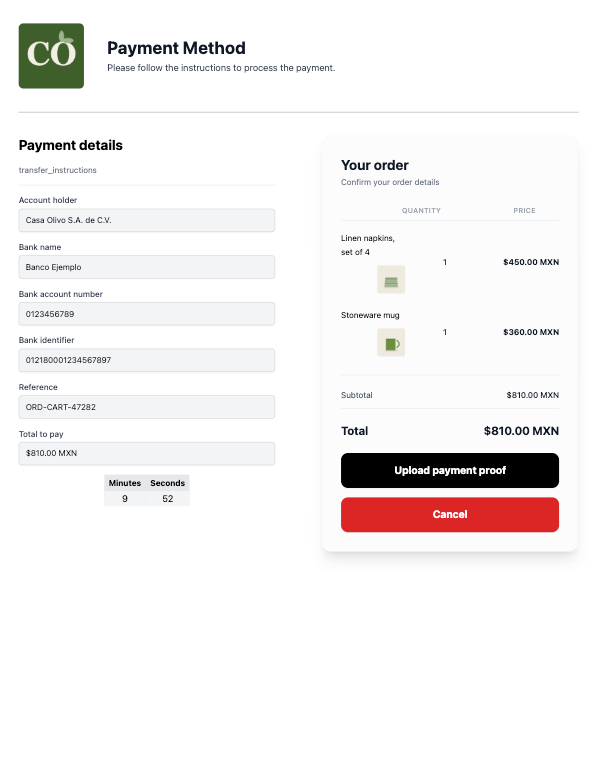
What your customer sees: after the order summary, a page with your account details, the order's reference, such as ORD-CART-1234, and the total to pay. They transfer from their bank, then click Upload payment proof and upload a JPG or PNG of up to 2 MB. The order is then received as Pending, with its payment Pending, and the emails of a new order go out.
The proof is kept in the Comprobantes de pago folder of your files and counts toward your space. While your store is out of space, the proof is not received: the customer reads This site cannot receive files right now. Try again later or contact the site. and cannot finish until you free some.
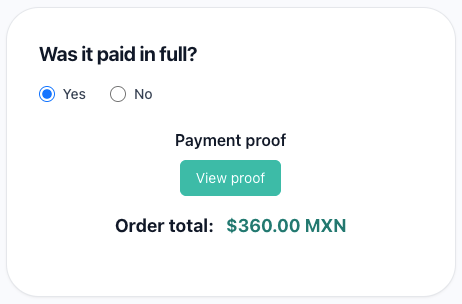
What is left for you: open the order, check the proof and confirm the payment with Register Payment, as Orders explains.
Pay at pickup
Shown once Accept pickup in store is on under Shipping Method. See Shipping and pickup.
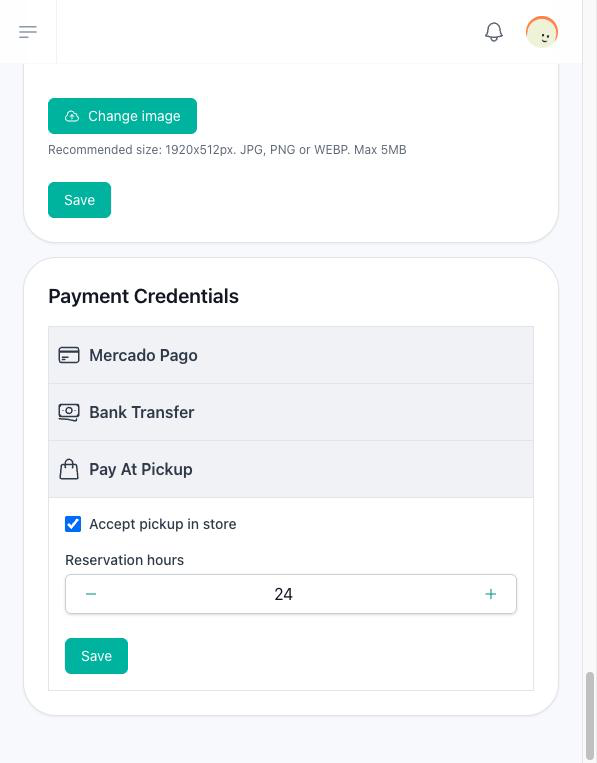
| Field | What to write |
|---|---|
| Accept pickup in store | On, the store offers Pay At Pickup. It is on for every new store. |
| Reservation hours | Between 0 and 48. The hours the customer has to collect the order. |
What your customer sees: instead of a payment page, the order summary has Finish order. The order is received as Pending, and the confirmation tells the customer they can pick it up within the reservation hours by giving the order number. The products stay reserved with no time limit.
Pay at pickup cannot be combined with Skydropx shipping: while it is the chosen method, the checkout does not offer Skydropx.
What is left for you: when the customer collects and pays, confirm the payment with Register Payment. The order is then finished.
The payments list
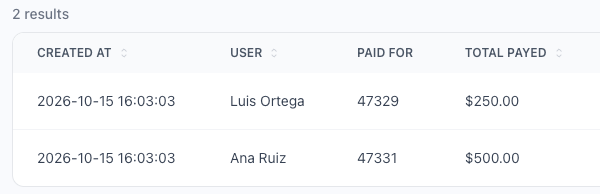
Sells → Payments lists every payment the store recorded: Mercado Pago payments when they are approved, and transfers or payments at pickup when you confirm them. The list shows each payment's Created At, User, Paid For — the order it pays — and Total Payed. Columns, above the list, adds Referrer, Net Payed and Payment Processor to it. Open a payment to see all of them together with its ID; for a transfer, Payment Proof shows View proof, or No payment proof uploaded when the customer sent none.
Turning a method off
When you turn a method off, it stops being offered at checkout. Its saved details stay in the settings, so turning it on again does not ask you for them. A store whose details were incomplete sees the method off until they are filled in.